After Effects is the foundation of any motion design career, but how well do you really know it?
How often do you use the top menu tabs in After Effects? Chances are, you probably have a handful of tools you use, but what about those random features you haven’t tried yet? We're taking a look at the hidden gems in the top menus, and we're just getting started.
In this tutorial, we’ll take a closer look at some of the best features inside the Edit tab in After Effects. At first glance, the Edit tab looks pretty bland. But there is so much more to this menu item than just undo and redo.
Ya'll are seriously talking about the Edit Menu?
You better believe it! Utilizing the Edit tab enables you to instantly create expressions, make your renders faster, and keep your workflow more personal. Here are the 3 things you should use in the After Effects Edit menu:
Property links
Purge all memory
Keyboard shortcuts
Let’s dive in.
Copy with Property Links
Expressions can be incredibly helpful. But let’s be honest—we don’t always have the time to tinker with the pick whip, troubleshoot rigs, or copy and paste code into every asset in our comp. Sometimes, we just want a quick expression ready to go.
In this section, I’ll show you how to skip the process of working with expressions, simply by using property links.
For those that aren’t familiar, property links are the specific characteristics of an asset that can be controlled: everything from scale, to position, to rotation. You can copy these specific properties and use them to control other assets in your scene.
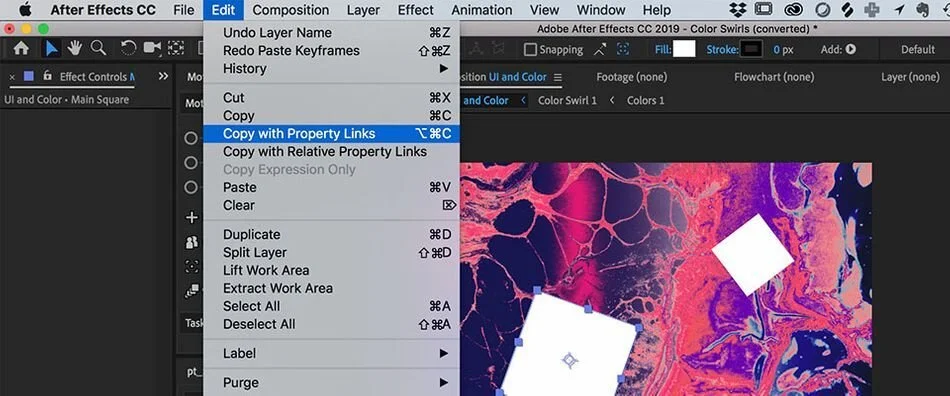
Let’s say you have one main square in your comp, and you want it to control the rotation of all other squares. You can use property links to attach the rotation of all squares to the main squares...without diving into expressions.
Simply select the rotation property of your main square and go to Edit > Copy with Property Links.
Now, select the rotation values on the other squares in your scene.
Hit Command+ V (Mac OS) Or Control+ V (Windows)
When you rotate your main square, the others will follow.
The benefit of using property links is that you can quickly set up rigs that would otherwise take time to write with custom expressions. This is especially helpful if you have a lot of assets in a scene that need to be rigged.
Purge All Memory And Disk Cache
If you’re looking to speed up the processing and render time for your projects, learning how to purge memory and disk cache is a must.
For anyone who’s not familiar, the disk cache is where the data from your After Effects file is stored. When you hit play in your timeline, After Effects is relying on memory from the disk cache to help the preview run smoother. But if the disk cache gets too full, it prevents After Effects from running smoothly. Clearing this out ensures that your computer has enough room to run at optimal speed.
In order to do this, simply head up to Edit > Purge > All Memory & Disk Cache. The best time to do this is usually when you finish a big project, and want to make space for your next animation.
Keyboard Shortcuts
Every motion designer knows that keyboard shortcuts are the lifeblood of a speedy workflow. Editing keyboard shortcuts helps you customize your process, and creates a more intuitive experience that fits your personal style. If you want to change your keyboard shortcuts in After Effects, this is how you do it!
To get started, go to Edit > Keyboard Shortcuts to unlock a whole panel of tools for finding and creating custom hot keys.
To create your own shortcut, select a key that isn’t being used, and search through the command menu on the bottom left. Then click Save As at the top to lock in your custom setup.
Everyone has their own set of favorite tools, effects, and tricks. By customizing your keyboard shortcuts, you can create an ideal workflow that’s best for your projects and preferences.
Look at you! On your way to becoming an After Effects Master!
Although you might not dig into the Edit tab very often, using these features is a great way to get the most out of After Effects. You can save yourself a lot of time and effort with copying property links, purging your disk cache, and customizing keyboard shortcuts.
After Effects Kickstart
If you're looking to get the most out of After Effects, maybe it's time to take a more proactive step in your professional development. That's why we put together After Effects Kickstart, a course designed to give you a strong foundation in this core program.
After Effects Kickstart is the ultimate After Effects intro course for motion designers. In this course, you'll learn the most commonly used tools and best practices for using them while mastering the After Effects interface.
© By Matt Nelson / School of Motion website


